On Needles

I’m often asked what kind of needles I use, and what size. If you’re new to hand sewing, needles can be a minefield as there are various brands and different sizes within each type. I wondered if it might be helpful if I gather some thoughts, and needles, together this morning.

Birdie is carrying far too many needles at present. He can barely stay on his feet

My favourite needles are made by John James, who have been manufacturing needles since 1840. In my view their needles were better before they developed the association with Entaco, who appear to be overseeing the manufacturing, but they are still good quality needles. You can read about the history of the company here. I am not on commission, by the way – I just like a good needle. What I especially like about this company is that they do a downloadable needle catalogue, showing each needle at its actual size – you can see that here.

The needles I use most often are embroidery needles, and quilting needles. You can buy embroidery needles in a range of sizes; in the picture below you can see sizes 3 to 10 (the higher the number, the smaller the needle). Embroidery needles are sometimes sold as crewel needles – they are more or less the same thing. They have a fine, pointed body with an elongated oval eye which is ideal for stranded cotton (other threads are available – I generally use this kind of needle for my hand-dyed silk and cotton threads). The size of needle you need depends on the type of thread you’re using as well as the kind of fabric you’re sewing on, and the kind of stitch you’re doing. If in doubt, go for matching the needle to the thread. Your thread should go through the eye of the needle comfortably without too much effort. If your thread rolls around in the eye or falls out, you probably need a smaller needle; if it feels too tight (you can sometimes hear it when this happens, and you will feel some resistance when you pull the thread through), then you probably need a larger size. I don’t take much notice of what the size is called, I just use whatever feels right for the thread.

Embroidery needles: from the left (ignore the two random ones on the far left, photobombing – they are a size 5 embroidery needle and a size 24 tapestry needle) – sizes 3, 5, 7, 7, 9 and 10

Quilting needles (often sold as Betweens) are shorter, stronger, and more flexible than embroidery needles. They are designed to pass easily through all three (or more) layers of a quilt, and to enable you to make small, fairly regular quilting stitches to hold the layers together. I often use these for general sewing as well because I like the shorter length. I use mainly size 10 and 11, and I like the Big Eye variety because my eyesight isn’t what it was. These needles also allow me to quilt with thicker threads.

John James Big Eye quilting needles, with grid ruler for scale

For utility hand sewing (sewing seams, piecing patchwork, etc – anything that needs regular cotton sewing thread, the kind that you would use in a machine) I use sharps. These also come in a range of sizes, and probably the easiest way to buy them is in an assorted set so you can choose the best needle for the job. Sharps are flexible, but not as strong as quilting or betweens, which makes them prone to breaking more easily. I generally use size 11 for sewing most lightweight fabrics together (quilters cotton fabric and lighter), and size 7 if I’m sewing thicker fabrics like medium to heavyweight linen.

Sharps needles, sizes 7 and 11

Probably the easiest way to see which needles you like, if you’re a complete beginner, is to buy a set of assorted needles and try them all on various fabrics with different kinds of thread.

Assorted needles: betweens, sharps, darners and tapestry

I am very bad at looking after my needles, which is why all these packs look so new. I’ve had to replace most of my needles recently because I leave them out, stuck in pincushions (like birdie), where they pick up dust and moisture from the atmosphere which turns them rusty in the end. They also become blunt over time. I thought it was probably time I made myself a needle case.

Birdie watches with interest. He will not be redundant, but he will have a bit of a tidy-up.

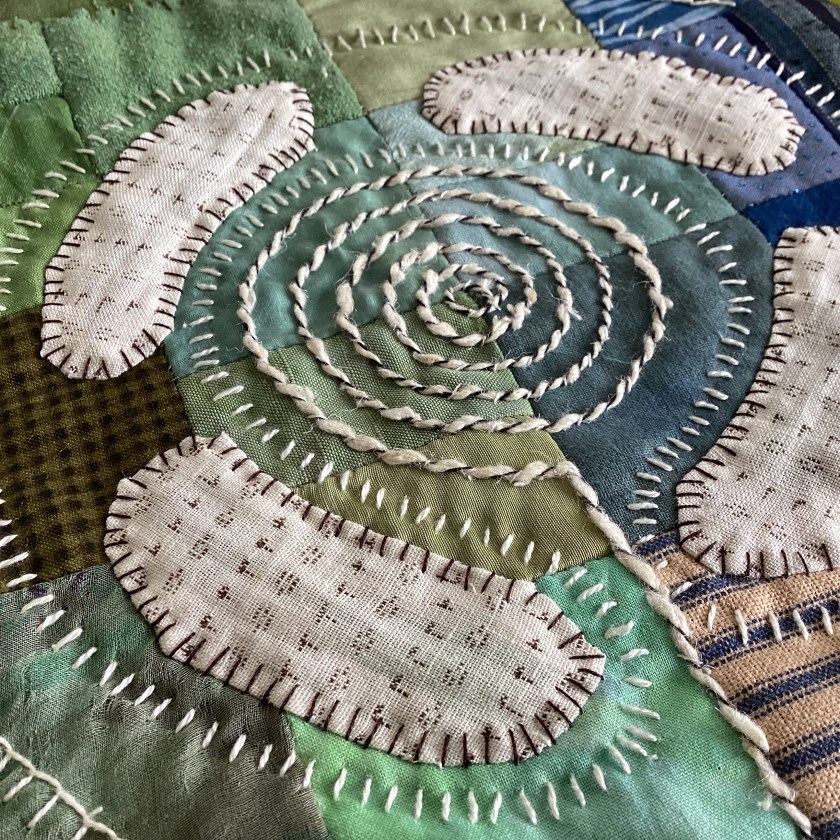
I’ve used a bitty background that I made a while ago – layered scraps covered with a sheer, with hand stitching across the surface. I’ve backed it with some hand-dyed cotton fabric, added a button and a buttonhole bar, and that was a very nice Sunday morning’s productive stitching.

Little needlecase

So there we are: a very quick gallop through some needles for hand-stitching, which I hope has been useful.

Many people these days tend to refer to hand-stitching as slow-stitching (though they’re not necessarily the same thing, as I understand it) and most of us are all about taking time out and slowing down. Needles in the past were valued for their ability to enable hand stitchers to sew more quickly. How times change.

Vintage needles: no friction no stop rapid work!

Thinking sideways, not knowing

I’ve been revisiting my Lines on the Land sketchbook this week. It’s a collection of sketches and designs based on ancient landscape features like standing stones and rock art, just to explore some of the patterns.

Lines on the Land, front cover

I made this sketchbook myself, using signatures of cartridge paper, and then collaged and painted the pages before assembly. I prefer to make my own sketchbooks because I have more control over the size, shape, and proportions. I don’t always like the proportions of standard A4.

I usually cut off part of the page when making a sketchbook if I know I’m going to include fabric or stitched samples, as with this one below which is waiting for me to do something with it:

Deliciously blank sketchbook waiting for an adventure

When I get round to doing something in it, I will be able to attach a stitched sample to the short tab which will form a new page that will be separate from the paper pages.

I didn’t do that with the current sketchbook; there are some pull-out pages, but no partial pages. While trying to figure out a way of sticking stitched samples in it without covering a finished page, I accidentally discovered that you can add pages sideways:

Extra page glued over the top edge of existing pages

You can lift up the stitched sample to reveal the completed page underneath. I like it. Necessity, invention, etc.

Mixed media sketch of Callanish beneath the stitched sample

Of course I made a cover for it. I do like a well-dressed sketchbook.

Front cover, patchwork earthwork
Back cover, patched ragged spiral

I’ve found spaces for some stitched samples I made a while ago:

Mixed media sketchbook page, mini monolith
Mixed media sketchbook page, circles
Textile sample, layered scraps and sheers on painted handmade paper

I don’t always think of a sketchbook as preparatory work for something bigger or better, though it often is that. This may or may not lead to some larger textile work. Part of the adventure is the not knowing, the voyage in the dark, and true of any creative venture I think. Having a go, never knowing whether what you’re making is any good or not. And then realising that it doesn’t really matter, if you’ve enjoyed doing it.

Little collages with drawings added

Little stitches

Making some progress on the Klee sketchbook front cover, based on his painting ‘Small Picture of Fir Trees’. I upgraded the blog and apparently I can upload videos now – this is just a little test to see what I can do.

A little seed stitching

I have a very small piece of hand-dyed silk net, which is one of the most delightful (and expensive) fabrics you can handle, and I’ve been saving it for a special occasion. I decided this was the occasion. I’m using an eco-dyed stranded floss from Arlee on layered organdie, silk organza and net.

I don’t often use a frame but seed stitching is easier this way. I also want to scatter stitches across the surface so it’s good to be able to see the whole thing.

Hand dyed silk net and silk organza

The sun is a raw-edge circle of loose-weave cotton scrim, covered with very sheer chiffon – a type of shadow applique, I guess, since the cotton circle is secured underneath the sheer.

In progress

Video, though. Imagine the possibilities!

Stitch Journal FAQs

I don’t know what’s happened on Instagram but suddenly I am inundated with lovely messages and many questions about the stitch journal. Where did everyone come from? I will try and answer everyone but in the meantime I thought a post covering the most frequently asked questions might be helpful.

I should point out that I did not invent the concept of the stitch journal. Claire Wellesley-Smith writes about it here, and you can read more about it in her book Slow Stitch. I decided, at the end of last year, that I would like to try a stitch journal myself. For me, it’s somewhere to place a few stitches every day, a contemplative practice to mark the passing of time, and an opportunity to reflect on anything that might have happened that day. I try not to be too literal with it – I prefer a series of abstract marks that suggest a feeling or thought – but sometimes a pictorial image just happens.

Here are some of the questions I’ve been getting, from those who might be thinking of keeping a stitch journal but don’t necessarily know where to start. The answers are not definitive, this is just how I’ve gone about it:

(1) What are you stitching on?

Several years ago, I was lucky enough to find a vintage/antique French metis sheet and I had been saving it for something special. Metis is a cotton/linen blend (I think linen warp and cotton weft) and has a lovely hand. The cotton gives it softness, and the linen gives it strength. It seemed the perfect ground for recording the passing of days, stitching the present onto the past – because most of us are a product of our experience. You don’t have to find vintage linen; any medium weight cotton or linen would be fine. Denim or canvas are probably too heavy and tough to stitch comfortably; something like a medium weight calico (this is a UK term, I think calico is referred to as muslin in the US) should be fine. My advice would be to avoid anything shiny, slippery or too textured.

antique French metis sheet

(2) How big is it?

I tore a strip from the length of the sheet which is about about 10″ wide (this includes a narrow hem down both long sides, to stop the edges fraying too much). The length is about 7 or 8 feet. If you are working with modern fabric, you can piece shorter lengths together to make it wider or longer. You can make it any shape or size, whatever is most practical for you.

(3) Are you stitching on more than one layer?

No, I am stitching on a single layer, just the sheet. If you are using a lighter-weight fabric then you might want to back it or line it. I wanted the back of the stitches to show. I think there is a very moving sense of honesty in the other side of hand embroidery and for the purposes of this piece I didn’t want to hide anything.

(4) Do you use a hoop or frame?

I rarely use a hoop or frame; I prefer to hold the work in my hands. If you are a novice embroiderer, you might find an embroidery hoop helpful as it will keep your tension more even and help to prevent puckering. I’ve been sewing by hand for a long time now and generally have a fairly good sense of tension. Having said that, I do pop the work in a hoop if I need both hands – French knots, for instance, are easier in a hoop. There are lots of online tutorials on how to use a hoop and how to work various stitches.

(5) What kind of thread/needle do you use?

I use a variety of thread – stranded cotton embroidery floss (the only type I will use is DMC – cheaper embroidery floss shreds very easily and doesn’t have the same texture), fine cotton embroidery thread, fine crochet cotton (you can often find this in charity shops; it dyes beautifully) and fine perle-type thread in silk and cotton. I dye most of my threads myself with procion reactive dye. I like variegated and space-dyed threads because of the unpredictable colour variation. I choose a needle to fit the thread – embroidery needles, crewel needles, and standard sharps/quilting needles are all fine. Your thread should pass through the eye comfortably but not too loosely.

OK, my threads get a bit tangled. Don’t we all?

(6) How do you decide where to stitch?

I designed a block template for each month when I first started the journal. The template is about 10″ wide by about 8″ deep, divided into 30 or 31 blocks to give one block per day for each month. I’ve designed the template so that the blocks tesselate slightly because I wanted the days to follow each other in a logical order, but also to fit together without any space between. Days don’t have space between each other; time just goes on forever without any gaps. I’ve also made the blocks different sizes because some days feel longer than others. Of course you can make your own template, and you can make the blocks any size and shape you want. You might want a space around your days – entirely up to you.

If a month has only 30 days, I don’t use the first division between 1 and 2. I stitch the days in the order they are numbered, because I want each day to follow the next and to share a border. February is slightly different, of course, so you can choose which blocks to miss out/merge together.

Monthly template, adaptable for 30/31 day months

Every month I trace the template onto the next section of sheeting, directly below the preceding month, and stitch the outline with basic running stitch. I have chosen a different colour for each month. I usually work a whipped stitch around the border of each block every day as I complete another section.

Template transferred to fabric with running stitch outlines

(7) Do you plan what you’re going to stitch?

There is no plan at all, this is completely intuitive. I choose a colour, thread a needle, place a stitch, and see where it goes. There are some completed blocks on the journal that I don’t like, but then there are some days I haven’t liked too so I feel this is a fair reflection of life, warts and all. I’m not trying to make a beautiful thing; I’m trying to make an honest record of time passing. Occasionally if something wonderful is happening in the garden (for instance, one of my favourite plants is flowering) then I might stitch an approximate pictogram that represents it. I generally allow between 10 and 30 minutes per day, depending on other commitments. Mostly the blocks are abstract shapes and lines, which I find more meaningful. Again, it’s all very personal, so you can plan as much or as little as you like, and you can make it as figurative or as abstract as you prefer.

(8) What are you going to do with it?

This strikes me as a slightly strange question. A stitch journal, as I understand it, is a bit like a visual diary. If you keep a written diary or journal, then it exists as a record of moments in your life. You don’t necessarily ‘do’ anything with it when it’s finished, nor does it have a functional purpose as an object other than being a reference point on which to fix your experience. This piece, when it’s finished at the end of the year, will be a completed object, not functional but with its own purpose as a visual witness of time passing. I have a previous post here where I think about how I will store the finished thing.

Plans for storing the stitch journal when it’s completed at the end of the year

I hope that this has been useful. If you’re thinking of starting a stitch journal yourself (or any form of daily stitch practice) then you can do it any way you want to, in whatever way best fits your life. You’re welcome to use or adapt my template if you want to; if you’re posting your work online or on social media, please do credit my design. You can start any time you want to, you don’t have to wait until the 1st of January – that’s just an arbitrary date that we have culturally decided is the beginning of another year. Any new beginning starts with a moment, and that moment can be now.