Amid all the thread winding I’m just dropping in to let you know that my recorded interview with the lovely Kate Ward of Making Zen is now available to watch on YouTube here.
It was a joy to chat with Kate about daily stitching, mark-making, time and other things, and I hope you enjoy watching it. Please do give it a thumbs up on Kate’s YouTube channel if you liked it.
In the meantime if you haven’t got your Making Zen ticket yet, you can still get it here. Upgrading to the VIP pass will let you access the workshops two weeks early, from 15th May.
zero-waste stitched samples
The VIP pass gives you full access to all the workshops plus some very generous free gifts from 32 participating artists. For transparency, I am awarded a small commission (at no extra cost to you) when you purchase your ticket from the links on this page, so you will be helping to support my work as an independent artist. Thank you so much.
You know, middle-aged English people rarely get truly excited about anything, but I am genuinely very excited to be taking part in Making Zen this month and I’m looking forward to sharing some of my favourite techniques with you.
And that’s that. I hadn’t anticipated when I started this in January that this year’s stitch journal might become a cloth book, but now I can’t see it as anything else.
2023: the year of the book
I’ve had a few messages recently asking if my PDFs or my online course include instructions for making the cloth book. They don’t, but there’s a blog post here that might help you to see how to make something similar.
New Year’s Eve inevitably encourages reflection on the days that have gone. There have been winter-into-spring days:
January/February
Spring days:
Early March
Long summer days:
June
Flowery summer days:
July
Early autumn days:
August
Autumn-into-winter days:
October
Actually let’s linger here for a moment as I think the leaves are my favourite:
Autumn leaves
Early winter days:
November
And ending at the beginning, in the winter:
December
Thank you so much for taking the time to visit and read my blog throughout the year. An especially huge thank you if you have purchased my PDFs, threads, fabrics, and online courses in the last twelve months – you have made it possible for me to make a living doing what I love. I’m enormously grateful to each and every one of you.
Tomorrow I’ll be starting on 2024, using my new template. I have no idea how it will work, but I’m looking forward to finding out. (A brief description of how I made the cover for it is here.)
2024: land ahoy!
I hope 2024 brings peace, joy and fulfilment to you. And – of course – some happy stitching.
Well, here we are. After a good few weeks of hard labour and a very steep learning curve, it’s about as good as it’s going to be, and I think I’m ready to let it out into the world. Thank you for your patience while it was under construction.
The course is all pre-recorded, with no live element – so there’s no rush to sign up and no requirement to be available at set times. You can access the material as often as you want, whenever is convenient for you.
Online course via Teachable
The course is aimed primarily at beginners, so it may be helpful if you’re just starting out with some hand stitching, or some daily stitching. If you’re already stitching quite confidently, there probably won’t be much there that you don’t already know. You can watch the introduction without committing to a purchase, and that will give you an overview of the course content.
Briefly, section 1 is about choosing suitable fabrics, needles and threads; section 2 focuses on a selection of easy hand embroidery stitches and various ways in which you can adapt them; and section 3 has some general information on how to approach hand stitching as a mindful, meditative practice.
Teachable landing pageLearn to make something like this
The course is quite informal in style and has me going ‘er’ and ‘um’ a bit, even with a script, but nothing is ever going to be perfect. I’ve tried to present it as if we’re in the same room, learning together.
If you don’t already have a Teachable login, you’ll need to create one (it’s free) in order to access the course.
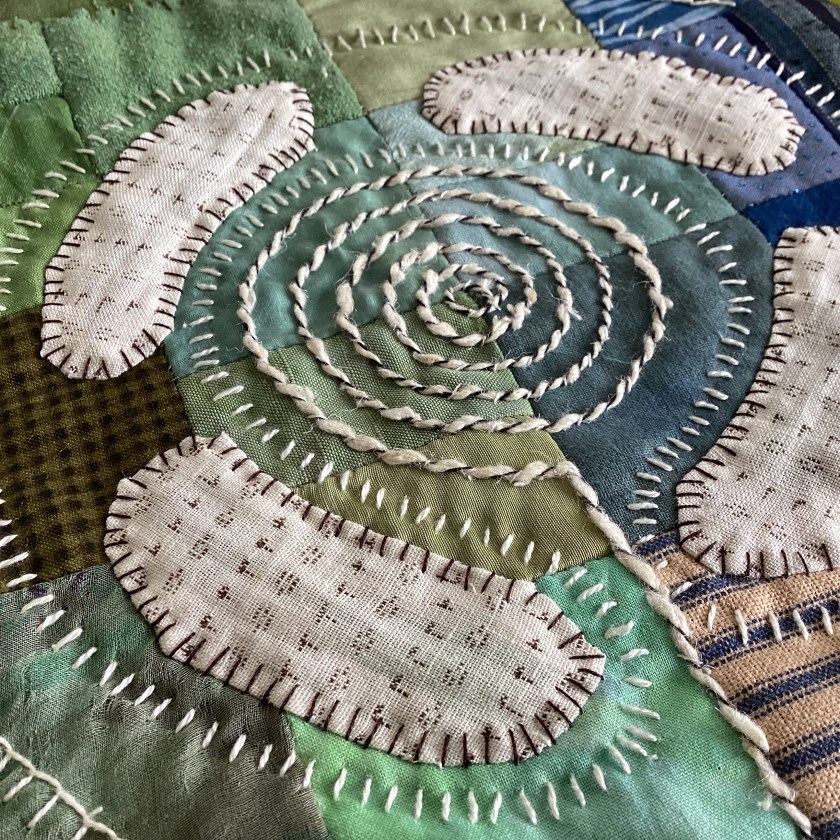
Here’s a bit of the demonstration sampler that I’ve used to show you the stitches. I finished the sampler after recording the course – I just show you the basics in real time. You should be able to recognise the stitches I’ve added.
The price of the course is in GBP, because I’m in the UK. If you’re not in the UK, you can use any online currency converter to see the equivalent amount for you. The secure online checkout system will automatically convert the price to your local currency.
Please try and remember this converted amount so that you recognise it when it appears on your bank statement later. If you don’t recognise the amount and flag it as fraud with your bank by mistake, that can cause extra work and expense for me. Thank you.
Selection of worksheets accompanying each stitch lesson
And after all that preliminary waffle, you can find the course here
If you do a lot of hand stitching, you can’t help inventing new stitch variations occasionally. There are lots of variations on basic stitches, and many ways to combine one basic stitch with another.
Blanket stitch tree with interlaced blanket stitch border
Here’s an interlaced/woven running stitch/blanket stitch combination, which looks best in two colours:
Sound on: Lovely Day, Bill Withers
You need to work a row of running stitch first, keeping the stitch and space between stitches as even as you can. Then you can work a blanket stitch into the gap, using a different colour, and weave through the running stitch to start the next blanket stitch.
Interlaced blanket/running stitch
A simple enough idea, and easy to stitch. It probably needs a better name though, combining blanket and running. Blanning stitch. Runket stitch. Oh dear me, no. Suggestions on a postcard please.
I thought I’d invented a pretty loop stitch the other day, but apparently it already exists.
Interlaced running stitch, discovered by accident
It’s basically pekinese stitch but with the thread looped around running stitches rather than back stitches.
The long cloth in the video and below has been in progress for a while, just somewhere to collect stray stitches and orphan fabric scraps when I remember to catch them.
Settle down with a cup of tea or something because there are lots of pictures today.
You might recall I enrolled on the Heart of Soil online workshop last month – you can see my earlier post about it here. I collected all the lessons into a little sketchbook, and it’s been a lot of fun to revisit some techniques I haven’t used for a while. I particularly liked the limited colour palette – just blues and yellows – and the pages in the resulting book are nicely coordinated.
Front cover with strip of hand dyed silk wrapped aroundFront and back coversString of Hearts class taught by Tiffany SharpeBluebird of Peace class taught by Megan Quinlan (mine is a blue tit, since I think that’s the closest thing we have to a bluebird in the UK)Buds class taught by Michelle Schratz
I went a bit off-piste with some of these and added some lines from a vintage poetry anthology to some of the pages, and I added a teabag pocket to this one too. I made a stencil from Tyvek for the background leaf and flower images.
The lines of poetry on the page below are from a Rupert Brooke poem, mixed up to create a found poem.
Pebbles and Peace classes taught by Leaca YoungPaper doll class (I adapted this one a fair bit just to get it on the page) taught by Kim Smith (@slaphappystudios on Instagram) and painted watercolour tubes class taught by Kelly Hoernig (@kellyhoernig.artist on Instagram)Watercolour wildflower garden class taught by Tracey WozniakWatercolour/mixed media backgrounds and mark making class taught by DeeDee CatronThe one-page journal technique, shared by Kiala Givehand (@kialagives on Instagram) and a sunflower for Ukraine taught by Lorraine Bell (@lorraine_bell on Instagram)
Of course the sketchbook itself is based on the one-page sketchbook technique (you fold a single sheet of paper, cut it strategically and fold it into an eight-page booklet) but I thought it would be fun to make a tiny sketchbook to tuck inside the bigger one. The smaller version is made from a sheet of A4 paper; just me enjoying myself, really.
Collaged pages in mini-sketchbook with various marks and papersPages from mini-sketchbook, collaged and painted, with lines from a vintage poetry anthology
I thought it might be fun to include a little video run-through but then I noticed the colour of my hands and thought I ought to explain. I did some dyeing this morning and – I do it every time – forgot to put the gloves back on when rinsing. My hands are not normally purple, just in case anyone is worried.
A very happy collection of classes and I enjoyed them immensely. Next up, I’m doing the Traveller Blanket course with the lovely Dijanne Cevaal and am looking forward to that. Next year I hope to be teaching online classes myself, and I’ve figured that the best way to see what works is to sign up for a few myself. And of course there is always something new to learn.
I’ve been revisiting my Lines on the Land sketchbook this week. It’s a collection of sketches and designs based on ancient landscape features like standing stones and rock art, just to explore some of the patterns.
Lines on the Land, front cover
I made this sketchbook myself, using signatures of cartridge paper, and then collaged and painted the pages before assembly. I prefer to make my own sketchbooks because I have more control over the size, shape, and proportions. I don’t always like the proportions of standard A4.
I usually cut off part of the page when making a sketchbook if I know I’m going to include fabric or stitched samples, as with this one below which is waiting for me to do something with it:
Deliciously blank sketchbook waiting for an adventure
When I get round to doing something in it, I will be able to attach a stitched sample to the short tab which will form a new page that will be separate from the paper pages.
I didn’t do that with the current sketchbook; there are some pull-out pages, but no partial pages. While trying to figure out a way of sticking stitched samples in it without covering a finished page, I accidentally discovered that you can add pages sideways:
Extra page glued over the top edge of existing pages
You can lift up the stitched sample to reveal the completed page underneath. I like it. Necessity, invention, etc.
Mixed media sketch of Callanish beneath the stitched sample
Of course I made a cover for it. I do like a well-dressed sketchbook.
Front cover, patchwork earthworkBack cover, patched ragged spiral
I’ve found spaces for some stitched samples I made a while ago:
Mixed media sketchbook page, mini monolithMixed media sketchbook page, circlesTextile sample, layered scraps and sheers on painted handmade paper
I don’t always think of a sketchbook as preparatory work for something bigger or better, though it often is that. This may or may not lead to some larger textile work. Part of the adventure is the not knowing, the voyage in the dark, and true of any creative venture I think. Having a go, never knowing whether what you’re making is any good or not. And then realising that it doesn’t really matter, if you’ve enjoyed doing it.
Making some progress on the Klee sketchbook front cover, based on his painting ‘Small Picture of Fir Trees’. I upgraded the blog and apparently I can upload videos now – this is just a little test to see what I can do.
A little seed stitching
I have a very small piece of hand-dyed silk net, which is one of the most delightful (and expensive) fabrics you can handle, and I’ve been saving it for a special occasion. I decided this was the occasion. I’m using an eco-dyed stranded floss from Arlee on layered organdie, silk organza and net.
I don’t often use a frame but seed stitching is easier this way. I also want to scatter stitches across the surface so it’s good to be able to see the whole thing.
Hand dyed silk net and silk organza
The sun is a raw-edge circle of loose-weave cotton scrim, covered with very sheer chiffon – a type of shadow applique, I guess, since the cotton circle is secured underneath the sheer.