Green

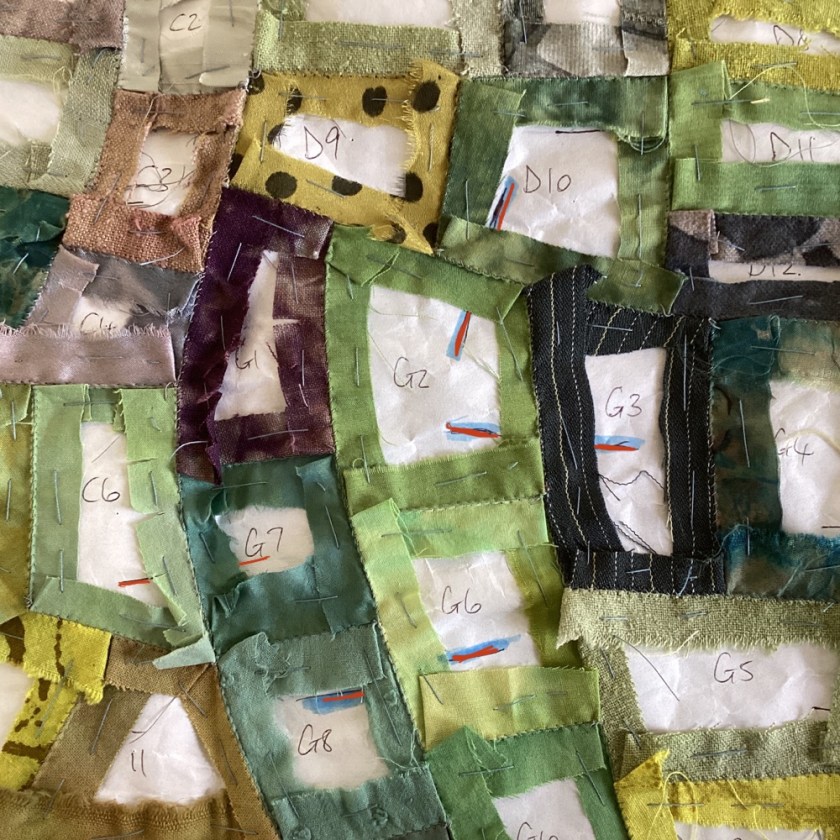
Probably my favourite colour, which is just as well because this is all very green indeed. Curiously, my camera doesn’t seem to like it and refuses to accurately render the colours. I can only say it’s much nicer in real life. Textiles are notoriously difficult to photograph in any case because of the way they hold and reflect light.

I’m starting to add some hedgerows between the fields, with silk boucle and various textured yarns. Just couching along the seams. I tried a few colonial and French knots but had to unpick most of them. You wouldn’t see that much detail from that high up, I don’t think.

As usual, simpler is better, and the textured yarns seem to be holding the lines ok on their own.

box of luscious textures with Valdani perle 12 threads

I’ve layered the patchwork over a piece of brushed cotton (cotton flannel) and backed it with an old hand-dyed cotton tablecloth, with the outer edges turned in over the mid layer so that the irregular edges of the patchwork will sit on the surface. Technically it’s a quilt, having three layers, but the brushed cotton is less dimensional than wadding (batting).

on the edge

I’m finding it difficult to get myself motivated at present, with the house move looming (though we still have no dates yet), so stitching hedgerows is quite a nice soothing activity for these uncertain days.

patchwork fields

Piecing

Not quite a square yard – it’s about 32″ x 34″, and all pieced together now. Some people think English paper piecing is too fiddly and takes too long, but I find it fairly quick and very enjoyable. I’m already thinking about a bigger, bed-sized version.

slightly blurry picture, but you get the idea

All the curves went together just fine, after I added the balance lines.

look at that lovely curve

The best part of English paper pieced patchwork is removing the tacking thread and papers, when all the piecing is complete. The cloth starts to relax, and you can see what you’re working with.

some of the tacking and papers removed

Much nicer to handle, and the colours seem to come alive more.

A few more to go, then I need to think about how to back it, line it, or quilt it. Haven’t decided where it’s going yet. There will probably be textured yarns couched along some of the boundaries and of course some stitch here and there. Maybe even some tiny sheep.

some tacking still in, some already out

Initially this was going to be a PDF pattern but I think it might be a bit too complicated for that. There is quite a lot of tweaking and easing, to get the curves to lie correctly and line up the balance marks, which is easier to do than to explain. Maybe a PDF for the intrepid.

And, incidentally, there is thread in the shop.

delicious

I anticipate that this may well be the last thread update before Christmas, as our house move may or may not happen before then. Everything is still very up-in-the-air at this point. Good job I have the patchwork to keep me grounded.

2024 daily stitching template

It’s early to be thinking about next year, but I’m launching my 2024 daily stitching template now for a couple of reasons.

mapping 2024

Firstly, we have accepted an unexpectedly prompt offer on our house, so it looks like we will be moving at some point in the next few months. I will need to close the shop temporarily when that happens, possibly at short notice. If we end up moving during the weeks directly preceding the start of January then the templates may be unavailable for a time.

Secondly, there is some optional preparation for next year’s template. You can either work one month at a time and add on each following month’s template as you go, or you can do some cutting and sticking to make one large template for the whole year, as I have done. Full instructions for this, including diagrams, are in the PDF.

2024 templates

I stitched a little sample just to see how it might look. It’s intended to be a kind of aerial map, a landscape seen from above. The whole thing will be about 30-31″ square or so. It’s about mapping the days to create a visual record of time passing, and thinking about the seeds we sow, the harvests we reap, and the paths we travel through the year.

2024 template sample

You can stitch field boundaries in whipped running stitch, or you can couch textured yarns and threads around each block to create something that might represent hedgerows or stone walls.

fields

And of course you don’t need to use it for daily stitching at all; you could just make a stitched sampler if you’re feeling ambitious or in need of a challenge. You can add paths, lanes, rivers, mountains – whatever you like. (If you’re new to daily stitching, you might be interested in my online course here.)

stitch journal template

It’s exactly the same as life, really. It can look unmanageable when you imagine the bigger picture but somehow we get up every morning and work our way through each day, just to keep going. We always get somewhere in the end, even if it’s not where we initially intended.

So here’s to new beginnings just beyond the horizon.

stitch sample

Balancing curves

You might recall the patchwork I started last month, using my proposed 2024 stitch journal template to piece together an aerial map of fields:

false start

I got so far with it and then hit a slight problem: having pieced two A4 sized blocks together, it became clear that none of the next A4 blocks were going to fit properly. My mistake entirely – a couple of mistakes, actually, and schoolboy errors at that. I had failed to read the plan before stitching, so mis-aligned the outer edges, and I hadn’t marked balance lines on the template for accurately joining the curves.

It was less work to start again than to unpick, so I’ll use my false start as a practice piece and then will probably turn it into a sketchbook cover, so nothing is wasted.

So for attempt no. 2, I added balance lines to the template.

balance lines (in red) for piecing curves

Piecing curves is tricksy and has to be accurate, particularly when a lot of separate pieces are involved. You can see how this works:

balance lines in action (in blue/red)

It’s just an extra insurance for making sure everything is going to fit correctly later on. If the balance marks don’t join up on either side of the seam, then you know you’ve gone a bit wrong.

curves fitting nicely

The second thing I’ve done differently this time is piece the thing in irregular sections rather than A4-sized blocks, and it seems to be working better.

sections completed

I’ll wait until each section is finished before joining them all together.

fitted but not joined

It’s probably about half done, and is continuing to come together quite nicely. At this stage it’s still very portable so is an easy and relaxing thing to work on in the evenings.

box of tricks

I only roughly planned the colours (as in all of the M section will be greens and golds, the A section was greys and browns etc) so it’s a nice surprise to find out what ends up sitting next to each other. Keeps it interesting. And I always think patchwork is a kind of piecing together of life’s problems too, and finding a solution in the whole. Art, stitch and therapy all at the same time. What’s not to like?

September

The end of September already. October tomorrow. It really will be Christmas before we know it. No use getting ahead of ourselves here though.

September daily stitching

I think the hag stones thing turned out OK in the end. Berries, apples, or pears would have worked equally well.

early September

I think of the little unstitched space in each shape as a tiny bit of welcome silence. The world always seems very noisy to me.

mid- to late-September

Our house has recently gone up for sale, and we are looking for quiet. Not remote, as I don’t drive and I need a good post office within walking distance. But some quiet would be nice.

I really like the blue spiral – textured silk yarn couched with silk thread

It still surprises me how much thinking time and reflection time there is in daily stitching. There is nothing to do except focus on needle and thread while you let the thoughts come and go.

the end of September

The entire page has turned out to be a visual record of our decision to look for a new home. Not in any literal or figurative sense, but I can see weighings-up, imaginings, letting gos, and looking aheads. There is a kind of loss as well as a potential gain, because every beginning is preceded by an end, and every end is followed by a beginning. It’s just one continuous line really.

Next month (sing along if you know it) – the falling leaves… drift by the window… those autumn leaves… of red and gold…

October awaits

Some letting go.

August daily stitching

Genuinely don’t know where August went. I say this every month, I know. Every day seems to pass in a blur.

I had some reservations about this template, but it’s turned out to be my favourite so far this year.

August

There were lots of options for how to stitch the radiating segments but generally my preference is for keeping things simple. Running stitch is restful to work, and can look really effective.

August, detail

I was thinking about first harvest for this month – that’s grain – and running stitches/small isolated stitches look like seeds, from which all things grow. And seeds are the culmination of a plant’s annual work too, so an end and a new beginning all at once.

August, detail
August, detail

The back, as always, is a kind of map. Or a mirror, perhaps. Beginnings and loose ends, which is what life is made of.

August, back

Next month – well, we’ll see how it turns out. The template was designed to indicate second harvest – that’s fruit – berries, apples, etc – but somehow I’ve made it look like hagstones.

September, waiting

I like hagstones. To me they are magical. Let’s see how they turn out. There’s no real plan, and no right or wrong. Just days, waiting to be filled.

New online course

It’s been a hectic few weeks, and another very steep learning curve, but my new online course is out now. All lessons are pre-recorded, so you can learn in your own time and at your own pace, and you get lifetime access once you’ve enrolled. You can watch the introductory video and read the notes for free.

In this course you learn how to paint your own fabrics – I show you some basic techniques and then away you go:

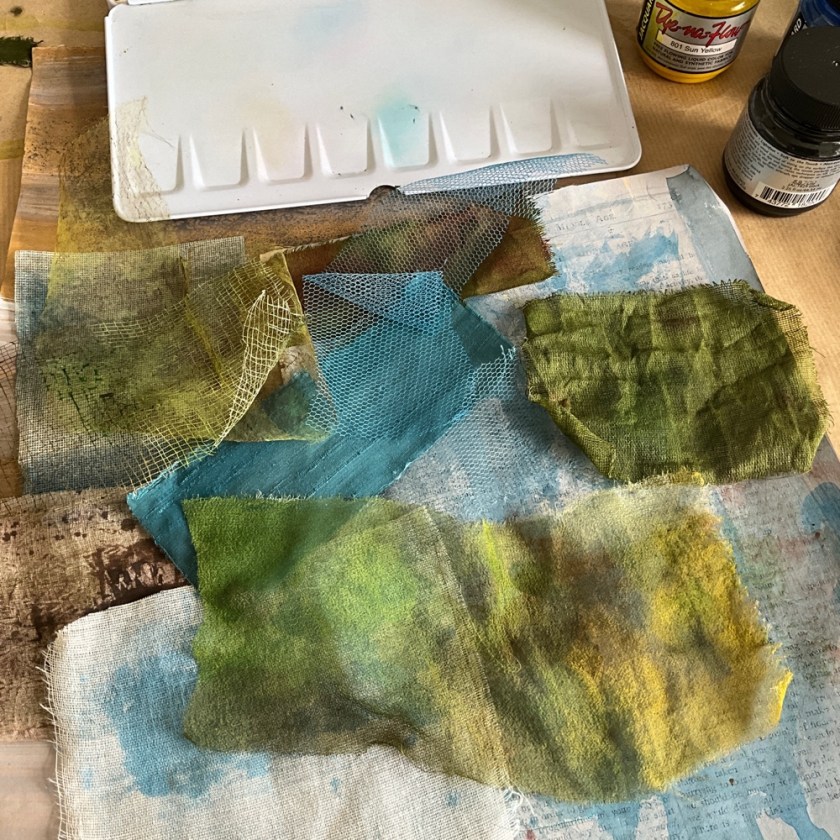
Painting fabric scraps with Dye-Na-Flow fabric paints

You learn to plan and develop your ideas in a sketchbook using some easy drawing, painting and collage techniques:

Sketchbook pages using drawing, painting and collage techniques

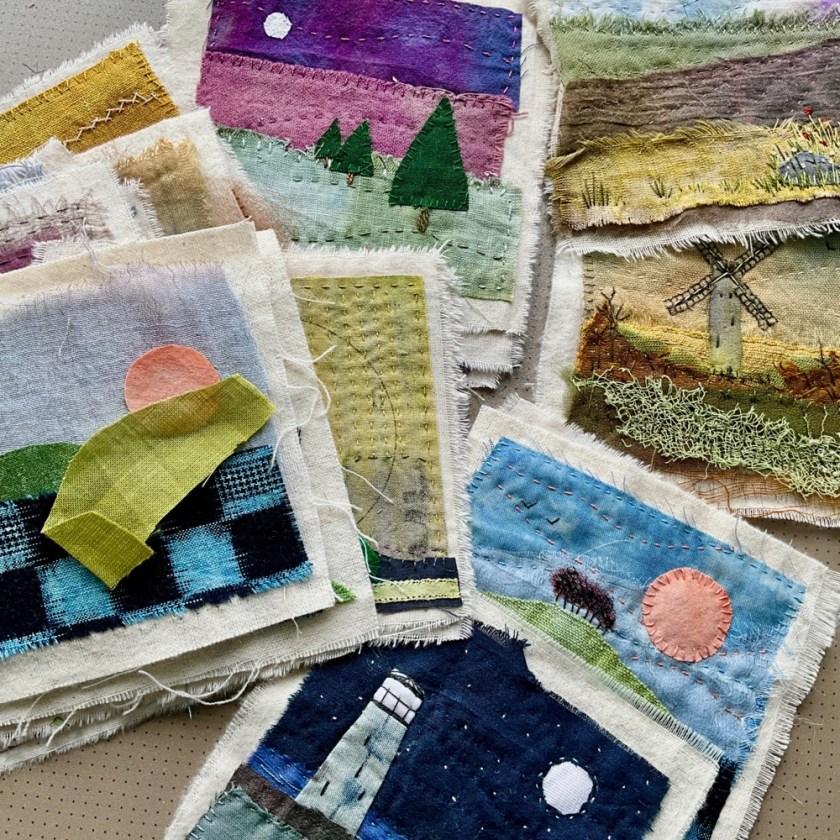
And you learn to layer and stitch fabrics to a foundation to create a unique little landscape. I show you how to stitch distant trees and hedges, how to add a sense of perspective to your picture plane, how to add buildings, structures, fences, and paths, and finally how to add foreground details using some simple hand embroidery stitches:

Little landscapes and how to make them into cards

The videos are very informal and are intended to look as if you’re in the room with me. Occasionally I dither about whether to move a scrap of fabric or paper up or down by a few millimetres, but feel free to fast-forward through the less engaging bits – and my video-editing skills are minimal, as you will see. However, I think it’s probably as good as it’s going to get, and I think it’s good enough for you to learn the skills I’m setting out to share.

I think there’s somewhere over three hours of video in total, and each lesson has written notes beneath the video section, so you’ll need to scroll down each lesson to see all the information. There aren’t any subtitles for this course, but the written notes and the video together should be enough for you to understand what to do.

I’ve also made up some little fabric packs in the shop here (undyed fabrics for you to paint yourself) and here (hand-dyed sheer, semi-sheer, and textured fabric scraps for layering).

Stitch a Little Landscape fabric scraps collection

I think the customary way to introduce a new thing like this is for me to say something like, ‘I’m super-excited to share details of my new online course…’

The reality is that middle-aged British people rarely get super-excited about anything, and frankly it feels terrifying, rather than exciting, to put this much of myself out there. But – well – feeling the fear and doing it anyway. Every day a new adventure, and every day a little braver.

July days

Daily stitching: July flowers

Another month gone, just like that.

A flower a day

I’m enjoying these templates for 2023, which you can find here. I didn’t think there was enough green on the page so I added some impromptu leaves here and there.

daily flowers, simple stitches

All threads are equal, but some threads are more equal than others, (with apologies to George Orwell). Thicker threads can look a little out of scale at this size, and I much prefer the motifs that have been stitched with finer threads – probably perle 12 and finer.

The very simple fly stitch flower below reminds me a bit of a snowflake. Summer is always followed by autumn and winter, and winter is always followed by spring and summer. The wheel is constantly turning, and time doesn’t stand still.

simple fly stitch flower

I think of these pages as self portraits. The other side is the face we don’t generally show to the world.

the other side of July

I’ve felt a hint of autumn in the air some mornings already, in this part of the UK, and the light is starting to change. The traditional pagan calendar sees autumn beginning tomorrow, with first harvest. My August template is meant to be a kind of geometric cornucopia, loosely based on the shape of traditional corn dollies that are plaited and woven at the end of the season and kept to ensure a fruitful harvest the following year. I’m looking forward to a more autumnal colour palette.

August awaits

We found three leftover ears of wheat by the side of a farmer’s field while out walking a few years ago. The harvest had already been gathered, and these were lying on the ground. I plaited the stalks (very inexpertly, as you can see) and we hang it on the hearth at this time of year as a wish for fruitful endeavours.

And on that note, wishing you a happy and fruitful Monday 🙂

Painting the land

Recently I rediscovered some work from a couple of years ago, from the pre-blog 100 Days of Winter series (all the pictures are buried on Instagram if you can be bothered to go back that far. 2019/20 I think it was). I sold some, gave some away, and still have a few left, which I’ve started reworking.

Work old and new, 4” square

I’m in the process of writing/creating an online course showing how to make these, and spent an engaging hour or so this morning experimenting with colouring some fabric scraps.

Painting some scraps

I’ve used watercolour, acrylic ink, and Dye-na-Flow fabric paints. An additional extra was accidentally creating some collage paper by using painted paper as a drop sheet.

Drop sheet collage paper
Blues and greens, land and sky
Sketchbook page with scraps

Still thinking it through. Learning all the time.

Journal to Book

A few people have asked how I’ve made this year’s long strip of daily stitching into a book. If you do an internet search for concertina-style books you will see that it’s quite an easy technique to adapt for cloth.

This is the process I’m using for turning my daily stitching, on a long strip of vintage bed sheet, into a cloth book.

You will need to make some sort of cover for your book, which will consist of a front cover, a spine, and a back cover – this can be all one piece, as mine is, or you can piece fabrics together so that the spine is a different colour. The cover needs to be a tiny bit bigger (a few millimetres, or a quarter of an inch or so) than your stitch journal pages.

2023 daily stitching, linen cover with simple running stitch
2023 daily stitching, inside back cover

To determine the width of the spine, you will need to fold your stitch journal cloth strip, concertina-style, back and forth, into as many pages as you want to have, and then measure the height of your folded stack. The diagram below shows roughly how the construction will work.

(very rough) diagram showing cover construction and page folds

The height of the folded stack will tell you how wide the spine of the cover needs to be. The spine of my cover is about an inch wide. The first and last pages will be stitched to the inside front and back covers, the valley folds will be stitched to the spine of the cover, and the mountain folds will form the outer edges of the double-sided pages.

Once your cover is constructed, you can start to stitch your completed pages down. It’s possible to stitch all the pages down right away, but I prefer to wait until they’re finished because once they’re attached to the spine, you won’t be able to get at them so easily.

page ready to be stitched down

You can mark the inside of the spine, dividing it into six (this is the number of times you will attach a valley fold) so that you have guidelines for where to stitch the page down. You will basically be sewing every other page to the cover. A running stitch is fine, but you could also backstitch.

marking page divisions on the inside spine of the cover

I use perle 12 cotton thread for stitching the pages to the spine, but any good strong sewing thread would be fine. Here’s the process in action:

stitching a page to the cover

Hope this helps.